Shelby Sawyer

Tag: paper

Mini Accordion Album–Pinterest Inspiration Week #14

This week I was inspired my this cute webpage. There’s some really neat stuff to check out! Plus, the photos were cool, and they got me thinking about what else can be done with bottle caps and photos. I decided to make a mini accordion album, and it looks super cute! Here’s how:

In an image editing program, like Photoshop, re-size and shape all your photos then position them slightly over-lapping each other. This is the hardest part, but with the right program it really isn’t bad. Once your images are how you like then print them!

Carefully cut out your photos.

Hot-glue all the pieces together.

Use wire to hold the photos in place. Now you have a personalized accordion album!

I will note that odd amounts like 11 or 13 pictures fit in the accordion style much better! I’m going to give this as a surprise thank-you present to Kyla. You can see all of her photos here and here. Seriously, this is really great. I now have an idea for a future photo project! Lemme know if any of you try this out 🙂

DIY Envelope–Pinterest Inspiration Week #11

So this post is a little late… About one week to be precise, but better late than never, right? I’m very excited about this particular post because it’s going to save me a lotta moolah here in a few years, and I can’t wait! Drum roll please! I learned how to make my own envelopes! Now this might sound kind of lame and cheesy, but have you guys looked at the prices of custom envelopes recently? With a little hard work on my behalf I can save myself more than half of what I would have spent! Now some of you might be wondering, “Why in the heck should I care? I don’t need that many envelopes, so I can splurge.” Whelp that’s all fine and dandy, but I’m thinking about sending out wedding invitations. Oh, yeah. Hundreds of envelopes will be sent out, and the invites are expensive enough as is, so I’m taking a step in the cheaper direction and making my envelopes. Here’s where I got the original inspiration. Now here’s what I did:

I carefully unfolded an envelope of the size I wanted to make.

Here it is all peeled apart.

Trace that envelope onto a piece of paper that you like. I used 12×12″ white scrap-booking paper.

Cut out your template.

Now fold that template like how your original envelope was folded.

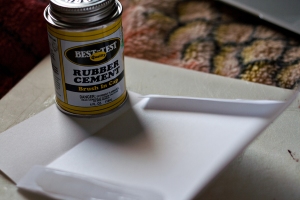
I used rubber cement on the folds that needed to be glued together.

I used my rubber cement pickup to get rid of the excess cement.

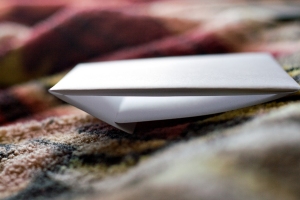
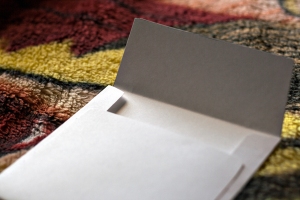
Here it is in all its glory 🙂

This is so ridiculously easy. I could probably make 200 in a matter of a few hours. Plus if I made them with any friends, then that would be even more fun!


DIY Fortune Cookies–Pinterest Inspiration Week #10

Phew! This has been a seriously looooong week. Why does it seem that we never catch any breaks? Hmmm, maybe that’s a good thought for a future post? Well anywho, here’s another tutorial from Pinterest!
I wanted to do something special for my honey since we haven’t been able to see each other a lot recently, so I decided to make these cute fortune cookies!

Here’s my step-by-step:

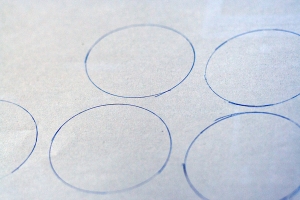
Draw out perfect circles. I used a cup as my guide.

Cut out shapes with scissors.

I chose to write onto the back of the cookies instead of cutting up little strips of paper because I’m notoriously bad at cutting things.

Fold circle in half but don’t pinch the edge!

Use your nail to put a dent in the fold, and use that dent to fold your paper together. It kind of looks like PAC-man doesn’t it?

Viola! Cute, right? I used glue dots to hold the fold together, so the paper keeps its shape.

For the record, Kyle loved these! He thought they were cute, and I got a big hug 🙂 Mission accomplished.

DIY Etched Mirror/Coaster-Pinterest Inspiration Week #7

Wow, I’ve almost been at this for two months! I seriously can’t believe it. It’s amazing how the day-to-day grind feels so slow, but when you look back on what you’ve done in the last few weeks you realize how quickly everything really moves. Today’s Pinterest Inspiration is kind of a two-fold. Mainly because I had an epic fail with my first idea, so I quickly moved onto another idea!

First I tried to etch a mirror. Here’s my inspiration. I was pretty excited about this project. Here’s how it went down:

Make and print a design you like onto paper. I just wanted something to simple to start with. *Update: Due to problems, I recommend using at least construction paper or better yet contact paper to print your design.*

Cut out black areas with an exacto knife.

See?

Go ahead and wash your mirror or glass before taping your stencil onto the surface. Then glob a bunch of glass etching stuff (I bought mine at Hobby Lobby) and wait a minute before rinsing.

Clean off your surface and viola! Well mine didn’t look so good. Plain printer paper is not recommended for this project. Obviously.

Since that was a bust, and I’m not one to waste craft supplies, I decided to turn my mirror into a coaster! Luckily my mirror had these nice little rubber pads on it, so all I had to do was cut off the string and craft away! Here’s what happened:

My failed mirror etching and the paper I was going to use to cover up my mistake.

I modpodged my scrapbook paper to the mirror, and then I modpodged two thin layers over the paper to seal it. Now it’s good to go!

Ta-da!

Folded Origami Hearts-Pinterest Inspiration Week #6

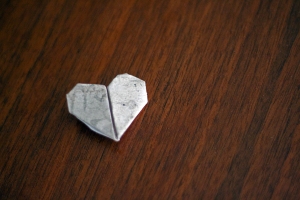
So as you may have noticed, I love origami and folding paper. A lot. I do it all the time, and I love learning new folds! Today’s fold I found on Pinterest, and I knew right away I had to try it! Confession time: I am horrible at learning things over the internet. That being said, the directions found here were very simple and easy to follow! YAY! I made these four really quickly, and I think if I glued them to the front of some magnets, then they would look great on my fridge too! Also they make quick and easy last minute gifts. Double yay! Here’s what mine looked like:

4 Leaf CloverCloverSo Many HeartsOne Lonely Heart

Custom Scrapbook Paper

Full Paper

Okay so I’ve been über busy the last two weeks, and I’ve definitely slacked on my Pinterest posts. Here’s a tutorial I actually came up with, so it’s not officially from Pinterest.

**Note: By saying I came up with this idea simply means the idea came into my head, and I acted upon it. I didn’t research how to do this. If I did, then I would find hundreds of tutorials probably better than this one. This one just happens to be mine**

Okay, so all of this started because I wanted some cool distressed looking coffee-ish themed paper. Whelp, come to find out my Hobby Lobby didn’t have what I was looking for!!! (For once in my life, that store let me down.) Well, my next bright idea was to maybe use stamps. Unfortunately, there wasn’t a lot of variety for the type of stamps I wanted, nor were the stamps on sale. So I resolved to making my own paper!

Detail #1

Here’s what I used:

Editing program (I used Adobe Photoshop)

1 piece of 12″x12″ white card stock (The brand I used is called “The Paper Studio”)

Any printer that fits a 12″x12″ piece of paper

Ink

**Note: You can adjust your paper size if needed depending on what kind of printer you own or for whatever use you need the paper size to be**

The Low-Down:

1.) I already knew which theme I wanted to use, so step one should be determining what theme or idea you want this paper to convey.

2.) Next I created a new document in Photoshop with 12″x12″ dimensions.

3.) I used textures, brushes, and stock images to create a desired look. **Note: ONLY use materials when the creator gives specific permission to do so! The materials I used were free for anyone to use, so be careful when just googling for things to use**

4.) I put the paper in my printer, and I printed the document through Photoshop just because it gives me more freedom.

5.) Let your paper’s ink dry before touching to avoid smudging and viola!

Detail #3

Some design tips I learned in art school:

1.) Less is more. There’s this thing called negative space, and it’s really awesome. Here’s a great article to help you understand.

2.) Texture is good. Texture adds the necessary dimension to a flat piece of paper. This article is great at explaining the why and how’s of texture.

3.) Color. We all know colors effect our moods. Well this also goes for your paper. Since I wanted an aged look I went for more of a brown and beige look in subdued and neutral tones. Here’s another really good article explaining in layman’s terms about color theory. There are additional links from that article for anyone who wants more color theory goodness!

Detail #4

Now I’m not a self-proclaimed designer. I’m not the best. I’m very, very far from it, but I have picked up a thing or two from school, and that’s what I’ve applied here! I hope this helps 🙂

Pinterest Inspiration Week #2

So last week I made caramel syrup through a recipe I found on Pinterest. This week I started experimenting with more paper flower techniques! Some of you may already know I make kusudama flower balls and sell them on Etsy, but this is a totally new world for me! The idea came from the site: 100layercake.com. The link to the original tutorial is here. Since I don’t have any books I’m willing to rip up, and I am a beginner, I used ads from a photography magazine I had laying around.

Paper Rose

The effect is still there even though it would be prettier if I had used nicer paper, plus I didn’t finish the bottom with ribbon like the tutorial calls says.

Paper RoseSee? No ribbon but this is what the bottom looks like.

Paper RoseI had a lot of fun doing this, and I will definitely be doing more of these! They’re surprisingly easy! Well easier than kusudama in my opinion 🙂